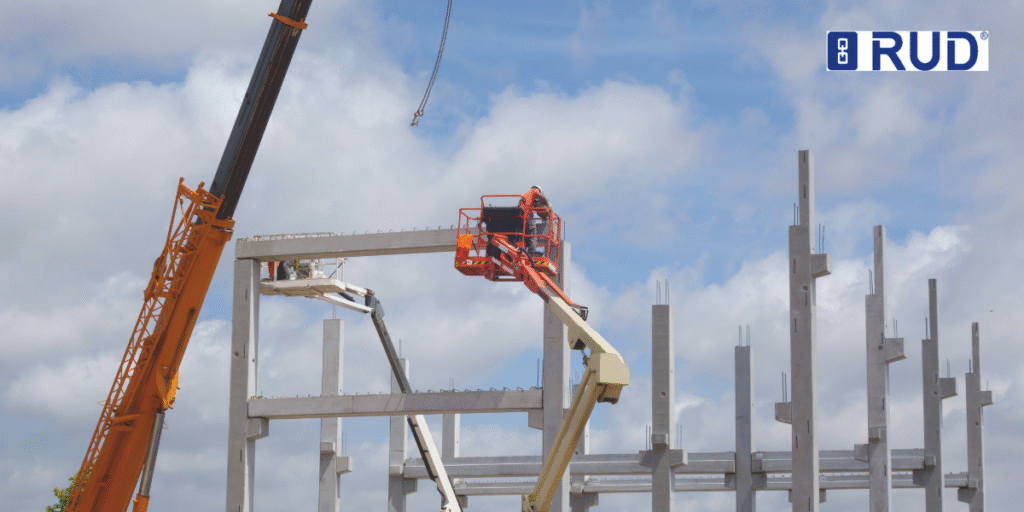
Selecting Lifting Points for Pre-cast Concrete Modules: Key Considerations

Selecting the right lifting points for precast concrete modules protects your investment and your crew. Get it wrong and panels crack during transport or worse, drop on site.
Most builders rush the planning stage and place lifting points where they’re convenient, not where they’re safe. The result is very obvious: cracked modules, project delays, and workers at risk from failed lifts.
And you know what? One miscalculation with your lifting point placement can send you back to square one with replacement panels.
This guide walks you through planning lifting points at the design stage, choosing between hoops and anchors, and picking the right lifting chains. At rud.com.au, we manufacture Grade 100 and Grade 120 quality chains built for Australian construction sites. So, we’re someone you can trust.
If you’ve ever second-guessed your precast concrete lifts, keep reading this article.
What Happens When Lifting Points Fail on Precast Concrete Modules?
Lifting point failures cause concrete panels to crack, break, or fall during transport and installation. And believe it or not, we’ve seen panels crack straight down the middle from poorly positioned points.

Here’s what happens when things go wrong:
- Panels crack or break under load: The stress concentrates at weak spots, and suddenly you’re looking at a 3-tonne precast slab with a split running through it. Panels that looked perfect in the yard arrive on site as expensive scrap.
- Workers get hurt from falling modules: A falling precast concrete panel doesn’t give second chances. One failure at a Brisbane construction site sent three workers to the hospital when a lifting point pulled out during crane operations. Scary stuff, right?
- Projects grind to a halt waiting for replacements: You’re not just paying for new panels (and yes, the delay costs add up faster than you’d think). You’re paying for idle cranes, crews standing around, and clients who aren’t happy about pushed-back timelines.
The point here is simple. When lifting points fail on precast concrete, everyone loses. That’s why getting the planning right from day one saves you headaches later.
Planning Lifting Points at the Design Stage
Planning lifting points early saves you from expensive repairs and dangerous on-site adjustments. You might be wondering why we’re hammering on about the design stage so much.
After working with precast concrete lifts across Brisbane and Ipswich for over 140 years, we’ve learned that the best time to fix lifting problems is before the concrete gets poured. Cutting corners at the design stage costs you later.
Calculating Loads for Precast Concrete Modules
Engineers need accurate weight calculations, including reinforcement steel, moisture content, and embedded fixtures. A precast concrete panel might look like it weighs 4 tonnes, but add in the rebar and wet concrete, and you’re pushing 5.5 tonnes.
Load distribution affects where you place lifting points across the module surface. The weight doesn’t spread evenly. Thicker sections and reinforcement clusters create heavy spots that need engineered placement. Uneven weight causes panels to twist or crack during the lift if your points aren’t positioned to handle it.
Concrete Strength and Lifting Point Placement
So what’s the real deal with concrete strength? Concrete must reach minimum strength before lifting, usually 75% of the design strength. Lifting too early, and the concrete around your anchors crumbles under load. Lifting points placed too close to edges create stress concentration and cracking.
The AS 3850 standards require specific embedment depths for different anchor types to prevent pullout failures. Once you’ve got the strength sorted, you need to think about where those engineered anchors actually go in the precast panel.
Positioning for Safe Lifting
Lifting points need positioning at the centre of gravity for balanced lifts. Get this wrong and your precast module tilts mid-air. Multiple points distribute weight better than single-point lifts on large modules, which is why most panels over 3 metres use four-point rigging for safe lifting.
The distance between points affects rigging angles and how much load your chains handle on each suspended load. Closer spacing means steeper angles and higher tension in your lifting equipment.
Lifting Hoops vs Anchors: What Works for Precast Modules?
Let’s be honest here, choosing between hoops and anchors isn’t always straightforward when you’re selecting hardware for precast concrete modules. Should you use cast-in hoops or threaded anchors for your precast products?
| Lifting Hoops | Threaded Anchors | Recess-Mounted Anchors |
| Suit panels needing multiple lifts during construction phases | Work better for modules lifted once, then permanently installed | Keep the concrete surface smooth for architectural finishes |
| Visible after installation | Can be removed after lifting | Hidden beneath surface patches |
| Engineered for repeated use | Single-use in most applications | Suitable for exposed precast work |
Cast-in lifting hoops handle the punishment of repeated lifts without losing their engineered durability. On the other hand, threaded anchors give you flexibility during installation because you can adjust positioning slightly if your precast layout shifts on site.
Now let’s talk about recess-mounted anchors. These are your best bet when you need clean concrete surfaces for buildings where aesthetics count. Each type has its place depending on your construction requirements and how the precast products are used.
Installing Lifting Points On Site in Australian Conditions
Australian job sites throw up challenges that affect how lifting points perform. But wait, there’s more to it than just screwing in an anchor and calling it done.
Hot Queensland weather affects concrete curing time and lifting point installation schedules. In our experience, precast panels poured during summer months need extra curing time before you can safely install threaded anchors or load test cast-in hoops. Rush the process, and the concrete around your lifting points hasn’t gained enough strength to handle the load.
Dust and debris on site can compromise anchor threading and load capacity. The devil’s in the details when installing anchors. A single grain of sand in the threads reduces how well your equipment seats, and suddenly, you’re working with reduced holding strength. So, our suggestion is simple. Clean every thread before installation.
What’s more, workers need proper torque wrenches to install threaded anchors to specification. Hand-tight doesn’t cut it on-site. The reason is that safe lifting practices require documented torque values to maintain the performance of your installed lifting points throughout the project.
How Do You Choose the Right Lifting Chains?
The right lifting chains make the difference between a safe lift and a disaster waiting to happen. When you’re moving precast concrete modules weighing several tonnes, your chains are the only thing between a successful installation and a dropped panel.
Matching Chain Grade to Module Weight
Let’s start with the basics. In our experience, manufacturing Grade 100 and Grade 120 chains at our Brisbane facility, we’ve seen too many sites use undersized equipment for precast concrete lifts.
Grade 100 chains handle most residential precast concrete modules under 5 tonnes. Grade 120 chains provide an extra safety margin for heavy industrial panels. The difference shows when you’re lifting engineered beams or multi-storey wall sections, where the loads push beyond the standard residential range.
Don’t forget to check chain certificates for recent testing and safe working load limits because undocumented chains are a gamble you can’t afford. Every quality chain comes with documentation that lists its working load limit and service history.
If the chain arrives without proper certificates showing its working load limit, don’t accept it.
Pre-Lift Inspections That Prevent Failures
Here’s what you need to inspect before every single lift:
- Check each chain link for visible cracks
- Feel for rough spots or bulges along the slings
- Test hook latches close properly and stay shut
- Measure chain diameter against manufacturer specs
Run your hand along each chain sling and feel for damage. One bent hook compromises the entire rigging system, so hooks need safety latches that close properly and show no stress damage from previous lifts.
However, we follow a simple rule here. We reject any chain showing more than 5% diameter reduction from wear. If the metal has worn down beyond that 5% threshold, the chain goes out of service.
The same applies to lifting slings and any other rigging equipment. Regular maintenance and inspection procedures catch these problems before they cause failure on-site.
Rigging Angles for Safe Lifting Operations
Now, here’s where things get technical. Chains rigged at 60 degrees or more create dangerous side loads on your lifting points. What does this mean in particular, though?
Well, the angle changes everything about how forces distribute across your precast panel. The best lifting angle sits between 30 and 45 degrees from vertical when you’re handling suspended loads with crane operations.
Different angles create different problems:
- 30-45 degrees: Safe operating range for most lifts
- 45-60 degrees: Increased tension on chains and points
- Over 60 degrees: Dangerous side loads create failure risk
- Vertical lifts: Limited to specialised equipment only
Wider rigging angles need stronger chains to handle increased tension forces. The Safe Work Australia crane guide explains how the same 5-tonne precast module creates different loads depending on your rigging geometry. Steep angles concentrate force at the lifting points and increase the risk of concrete breakout around your anchors.
Common Errors When Selecting Lifting Points for Precast Concrete
Since you know how to select lifting points properly, here are the mistakes that still trip up experienced teams. And that’s where things get messy for most teams.
- Too few lifting points on large modules: Picture a 6-metre wall panel supported by just two points. The middle sags under its own weight during the lift, stress cracks appear, and suddenly, you’re dealing with a damaged precast product. Four-point rigging distributes the load properly and keeps the panel flat.
- Placing anchors too close to panel edges: The concrete around edge-mounted anchors doesn’t have enough material to resist the pulling forces. When the crane lifts, the anchor tears through the thin concrete section. This consideration gets overlooked during rushed planning phases.
- Ignoring dynamic loads from crane movement: Your static weight calculations might be spot-on, but what happens when the crane swings the precast module or a gust hits mid-lift? Dynamic forces can double the load on your lifting points. One miscalculation sends you back to square one with replacement panels (we’ve watched this mistake happen on too many Queensland sites).
- Reusing damaged lifting inserts from old projects: Those anchors sitting in the site shed might look fine, but corrosion weakens the metal, and previous lifts create micro-cracks you can’t see. Using second-hand lifting points saves a few dollars upfront, but risks failure during transport or installation.
Pro tip: Always add 25% to your calculated loads as a safety buffer for precast concrete lifts. The extra capacity accounts for dynamic forces, material tolerances, and those unexpected moments when everything doesn’t go exactly as planned on site.
Getting Your Precast Concrete Lifts Right Every Time
The best advice we can give? Work with structural engineers during the design stage to specify proper lifting points for your precast concrete modules. Getting it right from the start saves you from scrambling to fix problems when panels arrive on site.
Once the design is sorted, source quality lifting chains from certified suppliers. RUD Australia manufactures Grade 100 and Grade 120 chains that meet Australian standards, with full certification for every lift.
Don’t skip the paperwork either. Document your lifts with inspection records and load calculations because these records protect your business during audits. When you combine proper planning with quality equipment and documented procedures, your next project runs smoothly, and everyone goes home safe.